
 Oh!!! Last weeken, I finally dyeing my yarn frist time!!! I order my Knitpick white dye yarn and dyes last weekend and mean time waiting, i had a little experiment with white yarn strash running around and fabric dye in my art box. Look at the yarn I dyed:
 I saw Dave Danial's blog "Cabin Cove," He dye most beautiful and amazing yarn i never seen. All the color way so great!! Check his web site out!!!
 Nowdays, i saw lot of knitter dyeing their own sock yarn as Dave does. Include Dave, i found some method of dyeing yarn from the different knitters: Check does blog!!!!
4. Reenie Art
Start with dyeing yarn, You need a white anmial yarn such as type wool inculd goth, sheep exc..I found white yarn at "KnitPick dyeing yarn".. Lot of knitters recoment this yarn. Also find other yarn does pleace you can get it from :"Wool2Dye4"/ "Beehvie Wool"-Sandnes Lanett yarn/Mumei yarn
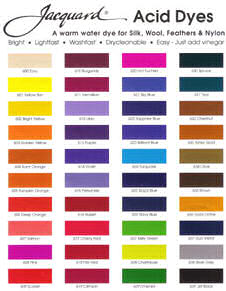
For dye: Dave use " Jacquard brand Acid Dyes" and I order Cushing Perfection Acid Dyes.
Now Start to dyeing: I used "RED HEART" White yarn because I didnt get my yarn yet so I just use what i have.. For dyeing, i must use wool yarn but I only have the Red Heart yarn. First i was thinking, RH yarn is not gonna work. Because it's Acrylic yarn and do not soak the dye in...But this is first time so i just try!!!!!!
The key to self-striping yarn is a really long hank. The stripes happen when there are long stretches of different colors. To get these long areas of color, you need a long hank. I used two chairs placed across the living room from each other.
 1. You will need to wind your hank around these chairs. This is a long walk. HeHeholding your original yarn hank however you need to so that it doesn’t get tangled. When you are done it will look like this.
 2. Tie the knot of end of loop. Because it this long loop so you have knot the knot several place so that when you when you dye, it will not all tangle up!!!
 3. Now, soak the skein in warm water with a dribble of vinegar. I did is, put in to soaking into sink.
 4. Cover the plastic drop at working area becuase the dye stein the area..MAKE SURE COVER ALL YOUR Area!!! It's time to take the yarn from their soak bath and gently squeeze out the water and place the yarn top od cover area LIKE THIS ABOVE:
 5. I used Rit Fabric Dye , becuase I order the acid dye last weeken so its coming soon. I just what i have. For Acid dye, Mix with hot Water and vinegar. Vineger is acid so when you mix with acid dye it creatsdeep colors right away!!!
 6. Dave use little tube bottles for mixing and applying dye..But i dont have a bottle so..I just mix with water,salt and vinegar into the my ceramic bowl.

7. There is two different way to applying the dye: One way is you just deep into dye with colors. This is long rop of yarn so put section the yarn into each dye and leave yarn for ontil yarn is soak. SEE PIC above:
 8. Another method, Use paint brush to apply dye. Like So......
 9. Like This!!!!! What a beautiful color!!!
 10. You can great great color like this!!!!
 11.Put it into plastic bag or plastic warp, close the bag or cover tiely so that steam is not getting out!!!
 12.LIKE THIS: Cover the plastic warp long way and made a spiral.
13. Use steamer(Pot that has hole, hold the water bottom) or slow cooker,place the yarn inside with plastic bag with little bit of wate!!! Everybody gonna think right now it's gonna melt but NO ...... It will not gonna melt plastic bag beacuse water makes not meltting. Stamer about 30min. You will the great bright color!!! Turn off the right and leave in the stemer for 10min let is cool down.
I didint take a pic so...Iam using Dave's pic: Thank You Dave!!!
14. Take out from stemer and peel off the plastic wrap. Then into the sink with warm water, rinse the yarn many time.
15. Squeeze water out hang up outside, let it dry!!!!! I use outside stirrail, ahng the dyed yarn!!!

 16. After dry, reskein the yarn!!! Finsh!!!!!

To make more personal, i made a tag for last touch!!!! I thought "Red Heart" yarn is acylic so not gonna worrk but it work really will!!! I love the color!!!
If have a qusetion, ask Dave for more dyeing information!!!!!


5 comments:
Wow, look at you go with all your dyeing! That looks great for your first try. You myst be SO proud.
You do not need more help, you have a great lesson right here! I like your little bowls with the yarn in each.
Wow, you did a really terrific job!
Wow! Thanks for showing me all that!!! I've never seen it done before. I always thought it must be magic. What a great blog!!
It came out beautifully -- very well done!!
That is so cool! You look like you had fun, Charles, and got some great yarns! I think RH is a mix of fibres, so the wool dyed, but the acylic didn't; nylon dyes a little. You will find that 100% wool will take dye deeper; silk is even better!
You might try steaming longer than 30 min; let it cool over-night, if you can. The dyes seem to stick better that way. You can use these acid dyes, or even Kool-Aid. If you are doing large batches, KA is too expensive. Watch what colours you are using next to each other: red and yellow make orange, red and green make muddy brown, yellow and violet make a muddy grey. Sometimes you can get wonderful tertiary colours, sometimes yucky shades. But it's all fun!
Now, to see that yarn knit up into something -- try it flat, knit in the round, socks and sweater -- all different effects on each!
Post a Comment